O
0
2022-11-28
MP4 | Video: h264, 1920x1080 | Audio: AAC, 44.1 KHz
Language: English | Size: 619.19 MB | Duration: 36m
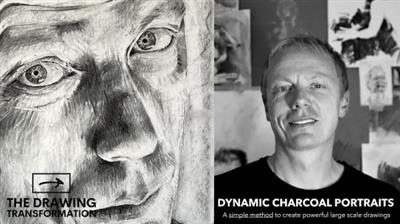
Dynamic Charcoal Portraiture The Simple Method To Create Powerful Large Scale Drawings
MP4 | Video: h264, 1920x1080 | Audio: AAC, 44.1 KHz
Language: English | Size: 619.19 MB | Duration: 36m
Dynamic Charcoal Portraiture The Simple Method To Create Powerful Large Scale Drawings
About This Class
Class Project
Description
Class Overview
Learn how to create a large, dynamic charcoal portrait. Use my unique step-by-step instructions to achieve stunning results rich in tonal mark making. You will also learn how to capture beautiful portrait photographs as source material for your final masterpiece.
Why should you take this class?
More those that say they can't draw. - I will prove you wrong!
For those who feel unaccustomed to, or even scared, of charcoal, fear no more - you will learn every stage of the development process learning to handle charcoal with confidence.
The skills you learn in constructing proportions, rending tonal values, and manipulating the medium on your drawing surface are transferable skills to use in any subject matter of your choice.
By the end of the class, you will be equipped with all the knowledge to transfer your siklls into your own area of interest.
Perhaps the built environment using contemporary and historical architecture to create your next large-scale tonal drawing?
Here are some examples of artists who have completed this project working with me.
What you will learn
I'm going to show my tried and tested method of drawing with charcoal which is very easy to understand and will produce some stunning results. Each of the six stages is fully explained with images and time-lapse video. They include
How to scale your work and develop accurate proportions using the grid method.
Lay a charcoal ground to broaden tonal control
Handle willow charcoal with confident lines and marks
Lift charcoal off the surface to reveal lighter values
Apply dark tonal layers while exploring expressive mark-making.
Refine detail with a careful rendering of compressed charcoal and pencil.
We will also explore how to find your own personal style with your drawings, learning to embrace imperfection, intuition, and experiment as you understand the limitations of using charcoal.
Is this class for me?
Absolutely yes! You do not need any specialist skills because I carefully explain each step of the journey. Even just a basic understanding of drawing is enough to achieve excellent results. All you need is the willingness to learn and not be afraid of getting your hands a bit dirty!
Materials and resources.
A3, A2 or A1 sheets of good quality cartridge paper.
Willow charcoal varying thickness.
Graphite or ideally charcoal pencil
Sharpener or scalpel blade.
Rubber pens (TomBow)
Putty Rubber
fine liner pens
Ruler
Let's do it!
Project Guide
Class Project
Many of the video demonstrations are produced by me recording my drawing application through time-lapse format to give you a clear understanding of what to do next. In addition, I will explain the process, materials and techniques as we go as your personal narrator.
Lessons
The outline. Giving you a clear understanding of the project including all the materials you need.
Photography made easy. I will show you my very simple studio setup to take a portrait photograph and also explain very simple editing methods to increase contrasts and deepen shadows to precisely the correct levels.
You will apply a charcoal ground to your paper then grid out your photograph and paper to ensure you get proportions as accurately as possible.
Mapping. Things are getting exciting! Using line you will lightly detail both the outline and all the interior features of the face.
You will now work a layer of expressive charcoal tone to describe the dark areas of the face.
Work the tone into the paper. Blend the charcoal into the paper using the charcoal bending tool to soften the harsh mark making.
We have lift-off! Remove the charcoal from the paper using the putty rubber to reveal lighter areas of the face and surroundings.
Using the charcoal pencil and the pen rubber work back into detailed areas to refine delicate shapes. First I will demonstrate working with the eyes and then the nose.
Sit back and admire your masterpiece! - And do not forget to upload your project to the gallery for help!
Overview
Lesson 1
 ynamic Charcoal Portrait Intro VID
Lesson 2:Lesson 1 Materials
Lesson 3:Lesson 2 Portrait Photography
Lesson 4:Lesson 3 Gridding your image and paper
Lesson 5:Lesson 4 Plotting your portrait drawing
Lesson 6:Lesson 5 Applying dark tonal values
Lesson 7:Lesson 6 Blending charcoal
Lesson 8:Lesson 7 Lifting light tonal values
Lesson 9:Lesson 8 Refining detail and texture
Lesson 10:Lesson 9 Reflecting on your drawing

rapidgator.net:
You must reply in thread to view hidden text.
uploadgig.com:
You must reply in thread to view hidden text.
nitroflare.com:
You must reply in thread to view hidden text.
1dl.net:
You must reply in thread to view hidden text.