
O
0
Last updated 12/2022
MP4 | Video: h264, 1280x720 | Audio: AAC, 44.1 KHz
Language: English | Size: 983.41 MB | Duration: 0h 47m
Use the Power of Clipping Masks and Much More
MP4 | Video: h264, 1280x720 | Audio: AAC, 44.1 KHz
Language: English | Size: 983.41 MB | Duration: 0h 47m
Use the Power of Clipping Masks and Much More
What you'll learn
Learn step-by-step methods for creating the initial flower drawing
Learn workflow best practices for use of selections, layers and other great features like snapping
Learn techniques for adjusting to perfect the shadows and highlights
Learn methods for keeping the flower composition fully editable for later adjustments and recoloring
Requirements
Procreate experience is an asset but not required
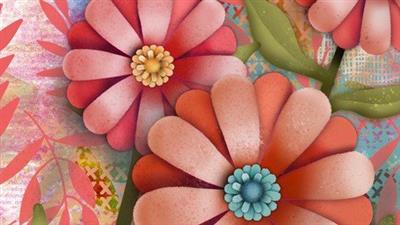
Description
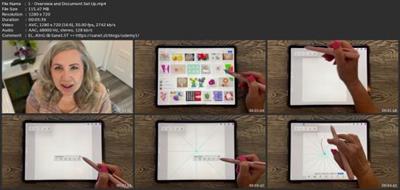
I hope you are ready for more dimension in Procreate, because that's what this class is all about. The art we will be producing today looks like an authentic paper cut flower, all inspired by a poster I saw. This class, Create a Realistic Dimensional Paper Flower Using Shadows and Highlights, will show you some of my illustration and dimension creating methodology. We will mainly be using Procreate airbrushes to paint the soft highlights and shadows, and there will be a ton of info on drawing and general use of selections and a few other shortcuts I think are relevant.In the class, I take you from start to finish in creating the dimensional flower, while of course adding details to make it unique. I supply a set of guides to help you with the initial drawing of the petals and explain an efficient method to repeat the petals once drawn. One of my goals is to show you how we'll be able to manipulate the flower once it is complete.In this class I'll walk you through:my step-by-step method for creating the initial flower drawingmy workflow for use of selections, layers and other great features like snappingadjusting to perfect the shadows and highlightscreating a textural and interesting backgroundmethods for keeping the flower composition fully editable for later adjustments and recoloringIf you want to try something new and different and you have a good basic knowledge of Procreate, you'll be able to go through all the steps. This class will benefit anyone who wants to brush up on Procreate skills and figure out new methods to improve efficiency.The key concepts I will include:review of my drawing techniques for repeating elementsbuilding up shadow and highlights for effective dimensionapproaches you can take in your creative workThis is an ideal class for you, even if you are unsure of an application for the art. I can see it being used for greeting cards or tea towels, or whatever! New Procreate ideas are always fun to play with. I swear you will create something really neat, and it's so satisfying!Intro to Create a Realistic Dimensional Paper Flower Using Shadows and HighlightsThis short intro will give you an overview of the class.Lesson 1: Overview and Document Set UpIn this lesson, I will give an overview of the document set-up. We will look at some quick examples for inspiration. You will also receive template document with the built-in grid I explain in these first lessons.Lesson 2: Rough Sketch and Painting PointersIn this lesson, I will break down the complete process of choosing what brushes to use as well as showing you how to do a super quick sketch of flower shapes. I show you several of the brushes from the resources package and explain the idiosyncrasies of each. Then we paint a few of the flowers and I explain the reasoning behind the choices I make.Lesson 3: Setting Up the Flower's LayersIn this lesson, I will show you step by step the method I use for creating the multiple layers needed. This is an alternative to the previous lesson which will use different snapping and flipping techniques.Lesson 4: Adding the Airbrushed ShadowsThis is the lesson in which I teach you about creating the shadows using selection and fills and then the Gaussian blur. Once we have the shadow established, we will airbrush some variety into it to make it look more natural. I show you a bunch more adjustments as we work our way through this lesson.Lesson 5: Adding the HighlightsIn this lesson, we begin to add the highlights that give it so much added dimension. I guide you through it step-by-step while pointing out all the things to look for in the example. Then we will use liquify to adjust the petals to look more organic. I will be finalizing most of the dimension. We are one step closer to finalizing our flower now.Lesson 6: Background and Texture DetailsAdding all the finishing touches is the focus of this lesson. I will be adding all the background textures into the piece and then further enhancing all the foreground items with a combination of the color multi-media brushes as well as textures such as spatters.Lesson 7: Conclusion, Mockup and Next StepsWe will conclude everything in this lesson. I show you a couple of quick mock-ups with the pattern and we end with a chat about next steps.Concepts covered:Concepts covered include but are not limited to Procreate floral 3-d design, layering, transparency, Procreate brush stamps, Procreate canvas settings, Procreate snapping and guides, the Brush Studio in Procreate, flipping and rotating, Gaussian blur, selection techniques, drawing with selections and curve precision, adding texture with brushes, procreate brushes for adding other interesting details, workflow best practices, painting best practice, Procreate composites, techniques with paints and blending, and much more.You will get...50 minutes of direction from an instructor who has been in graphic design business and education for over 40 yearsknowledge of multiple ways to solve each design challengean outline with links to further researcha list of helpful online sites to further your education into surface pattern designProject DescriptionChallenge yourself today and download and install the Procreate brushes provided to get started on your 3D flower. I have also supplied the grid for drawing the petals if you think you will need it. Work through each of the lessons, applying the concepts as I teach them.
Overview
Section 1: Introduction
Lecture 1 Overview and Document Set Up
Lecture 2 Rough Sketch and Painting Pointers
Lecture 3 Setting Up the Flower's Layers
Lecture 4 Adding the Airbrushed Shadows
Lecture 5 Adding the Highlights
Lecture 6 Background and Texture Details
Lecture 7 Conclusion, Mockup and Next Steps
iPad users looking to broaden their horizons and learn new techniques
Download link
rapidgator.net:
You must reply in thread to view hidden text.
uploadgig.com:
You must reply in thread to view hidden text.
nitroflare.com:
You must reply in thread to view hidden text.
")