
O
0
2022-12-20
MP4 | Video: h264, 1920x1080 | Audio: AAC, 44.1 KHz
Language: English | Size: 1.51 GB | Duration: 1h 8m
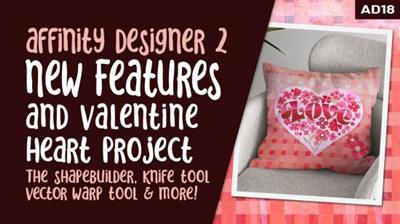
Ad 18 Affinity Designer 2 New Features & Valentine Project Using Shapebuilder, Knife Tool And Warps
MP4 | Video: h264, 1920x1080 | Audio: AAC, 44.1 KHz
Language: English | Size: 1.51 GB | Duration: 1h 8m
Ad 18 Affinity Designer 2 New Features & Valentine Project Using Shapebuilder, Knife Tool And Warps
About This Class
When learning new software, the key is to practice! After a few weeks of using Affinity Designer 2, I can tell you that the more you practice, the better. For today's project, I want you to use the ty
Description
Learning new software can be a real challenge. I recently transitioned into Affinity Designer 2, and I wasn't sold on it right away. There was a lot to get used to. I can tell you, though, that I am now completely enamoured with it. I have been experimenting with all the new features, as you have seen in a couple of my recent classes. I challenged myself to focus on three new features in the project I am bringing you today. I wanted to really try the new tools out, so I fashioned this Valentine Project in such a way as to use the new Knife Tool, the Shapebuilder Tool and the super fun Vector Warp Tool. I have thrown in a bunch of other things that I have never covered in other classes as well, so you will see me use the Appearance Studio and Styles and FX in different ways. With this project, we will create warped lettering, cut it into separate parts with the know tool to do some fun effects with gradients and fills, and we will do a few other little things to really enhance the design.
In this class I'll walk you through
The use of the new Shapebuilder Tool
The use of the new Knife Tool
The use of the new Vector Warp Tools
Learning the new locations of many functions like arrange, transform and align
Use of the Appearance Panel and Styles and FX which can be applied to alternate objects
Review of adding texture using the Pixel Brushes in the Pixel Persona
I know that I still haven't covered all of the new features as more and more is revealed from the experience and just using the software on a day-to-day basis. Let me convince you! This is an awesome new upgrade and I am loving it more and more each day. I was a die-hard Adobe Illustrator fan, but am starting to prefer using Affinity Designer. I am sure using it a lot more than Illustrator these days!
The key concepts I will include
use of both the vector and pixel personas
Planning and creating intricate designs with Shapebuilder
Looking at future projects with an eye for using the new features
Incremental approaches to learning new software
Using these new tools and feature will give you a challenging yet satisfying new set of skills. As you learn more and more about their use, you will begin to imagine new ways to use this powerful software. You will soon forget the old version and love what you can do with the new features!
Intro to AD 18 New Features and Valentine Project
This short intro will give you an overview of the class. We will take a look at inspiration and definitions in the next lesson.
Lesson 1: Setting Up and Project Overview
In this lesson, I will give a ton of inspiration. I show you what I am basing my project on with examples of methods to make lettering more interesting. I speak to some glitches in the color swatches palette and review some of the new things we will cover in more detail in the upcoming lessons.
Lesson 2: The Vector Warp Tools
I will show you the use of the vector warp tools in this lesson. We will set some display type and I will show you how it looks with various warps as well as converting it to curves to apply various fills.
Lesson 3: The Knife Tool versus Clipping Masks
In this lesson I'll show you the Knife Tool and its idiosyncrasies. I want to explain that this is a destructive process, so we will also compare it's use with the use of clipping masks. I explain the values of doing it using either method. Once the shapes have been cut with the knife tools, we will have some fun with gradients and fills.
Lesson 4: The Shapebuilder Tool
The Shapebuilder Tool is one of the main perks of using the new version of Affinity Designer, in my opinion. I have used it often in Adobe Illustrator, and I considered it a real missing link in AD 1. I will show you various ideas including how to do an over-under weave and how to produce a Celtic Knot.
Lesson 5: Appearance Studio, Styles and FX
In this lesson, I will show you the use of the Appearance Studio to add multiple strokes to objects. I will show you how to use that appearance on lettering. I will do a quick demo of using a warp and placing it within another object as a clipping mask. We will also use the Adjustments Studio in this lesson.
Lesson 6: The Large Background Weave
I finish the background weave in this lesson, demonstrating the entire process with the Shapebuilder Tool. I explain the best method to work your way through it and I even trim the entire piece at the end, showing you a couple more functions in the Shapebuilder task bar.
Lesson 7: Bits and Pieces and Saving Overview
I show you a few issues I have run into with this version of Affinity Designer. I break down the merging of curves to apply effects. We speak about blending modes. I wrap up with further information about saving documents and creating pre-sets, as well as deleting pre-sets on the home screen.
Lesson 8: Final Design, Conclusion and Wrap Up
I break down all the additional details I added off-camera. Once we are done all that, I show you all about shading. We will use the pixel shaders, which I have grown to really appreciate. I explain how a pixel layer is added and we do all of this in the Pixel Persona.
We will conclude everything in this lesson. I show you a couple of quick mock-ups with the art I also show you how I put the finished art pieces into a collection and display those parts on a Sell Sheet. I conclude everything in this lesson.
Concepts covered
Concepts covered include but are not limited to The Affinity Designer Vector Persona, the Affinity Designer Pixel Persona, the rectangle tool, the pencil tool, layering, expanding a strokes, the Shapebuilder Tool, the Knife Tool, The Vector Warp Tools, Boolean Operation, glitches in AD2, the node tool, new tool locations, importing bitmap fills , the Adjustments Studio, the move tool, shapes, Affinity Designer Appearance Studio, Affinity Designer FX, Affinity Designer placement print design, Affinity Designer Color Studio, texture bitmap fills, and much more.
You will get the bonus of.
1 hour and 8 minutes of direction from an instructor who has been in graphic design business and education for over 40 years
knowledge of multiple ways to solve each design challenge
See project for additional study links
Project Guide
When learning new software, the key is to practice! After a few weeks of using Affinity Designer 2, I can tell you that the more you practice, the better. For today's project, I want you to use the type tool and set a simple 4 or 5 letter word. You will perform the following manipulations
Use the vector warp tool to change the shape of the word.
Convert the word to curves.
Use the knife tool to separate into a top half and a bottom half.
Fill both halves with a fill of your choice: gradient or bitmap, or a combination.
Create an interesting basket weave pattern using the techniques outlined in class.
Draw a heart shape using the shape tool.
Adorn the heart with flowers or your choice of fillers.
Place your word within the heart and surround it with flowers or other adornments.
Experiment with creating a double-outline and apply it to your lettering or another part of your design.
Once complete, post your project!
Additional links for reference
Affinity Designer 2 Video Tutorials
Overview
Lesson 1:AD 18 New Features and Valentine Project
Lesson 2:Lesson 1 Overview and Reference
Lesson 3:Lesson 2 Vector Warp Tools
Lesson 4:Lesson 3 Knife Tool Versus Clipping Masks
Lesson 5:Lesson 4 Shapebuilder and a Weave
Lesson 6:Lesson 5 Appearance Studio, Styles and FX
Lesson 7:Lesson 6 The Large Background Weave
Lesson 8:Lesson 7 Bits and Pieces and Saving Overview
Lesson 9:Lesson 8 Wrap Up
Download link
rapidgator.net:
You must reply in thread to view hidden text.
uploadgig.com:
You must reply in thread to view hidden text.
nitroflare.com:
You must reply in thread to view hidden text.
1dl.net:
You must reply in thread to view hidden text.
")