
O
0
Published 12/2022
MP4 | Video: h264, 1280x720 | Audio: AAC, 44.1 KHz
Language: English | Size: 1.72 GB | Duration: 1h 25m
Draw in Procreate, Vectorize in Capture, Save as SVG for Designer, then Arrange in a Half Drop Pattern
MP4 | Video: h264, 1280x720 | Audio: AAC, 44.1 KHz
Language: English | Size: 1.72 GB | Duration: 1h 25m
Draw in Procreate, Vectorize in Capture, Save as SVG for Designer, then Arrange in a Half Drop Pattern
What you'll learn
• drawing pattern parts in Procreate
• importing vectors into Affinity Designer as SVG files
• auto-tracing in Adobe Capture or your program of choice
• auto-tracing in Adobe Capture or your program of choice
Requirements
I recommend classes 1-6 in my Affinity Designer series
Description
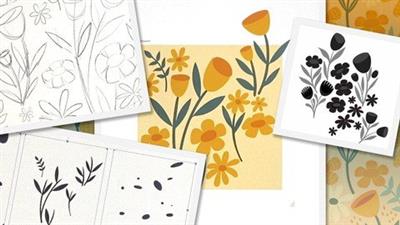
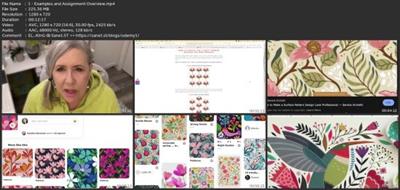
This class, Affinity Designer 7 - Create a Half-Drop Repeat in Affinity Designer, is the 1st in a 3-part series to reinforce what you have learned in Affinity Designer as it applies to Surface Pattern Design (7th in sequential order of all DeloresArt AD classes).This class is packed with so many important workflows which you will learn. To ease the transition from raster to vector, we will start in Procreate to do our sketches. Here we will do the rough planning for the half drop repeat. Once this is complete, we will also do the final inking. At this point, we take a break from the creative to produce the half-drop template. The beauty is that it is reusable, and I explain the importance of making a duplicate for future use.The next step in this workflow is to vectorize. We have done this in a previous class, so choose the method you liked the best. I will give you a quick run-through with Adobe Capture just to reinforce. There are some efficiency strategies that will help tremendously, so I explain that thoroughly. Once we bring the layers into Affinity Designer, we will align them and do a quick coloration to make the next challenge easier: grouping each motif so all parts move together.Slowly but surely, we will start to refine the pattern. There are many little things that come up, but I show you all of my troubleshooting, so that you can really understand what the goals are and what you must do to perfect the pattern.At the end, you will have a finished half drop repeat pattern ready for the next stage which will happen in class #2 of the series, Adding Embellishments.In this class I'll walk you through:drawing pattern parts in Procreateauto-tracing in Adobe Capture or your program of choiceimporting vectors into Affinity Designer as SVG filesgrouping multi-part motifsarranging in the re-usable half-drop repeat pattern template we will create in classperfecting the pattern and preparing for the next classWorking with repeat patterns in vector documents is another important skill to learn, and my guidance will help you through the questions you may have. This class will benefit anyone looking to add surface pattern design to their list of attributes.The key concepts I will include:layer management and efficiencieshow to perfect patterns in Affinity Designerworking with layers and groups in-depthAdding to your knowledge of vector software workflows is ideal in our profession and important for you to learn. We will create a repeat pattern, step-by-step, and think of further applications in future classes.Intro to Affinity Designer 7 - Vectorize Procreate Motifs, Import to Affinity Designer and Create a Half-Drop RepeatThis short intro will give you an overview of the class.Lesson 1: Examples and Assignment OverviewIn this lesson I will show you a ton of inspiration. I explain what you will need for the assignment you will be working on in class.Lesson 2: Design Process for Half-Drop Repeat in ProcreateIn this lesson, I go show you the entire process of sketching the pattern I want to create. My sketch is very rough, but I explain throughout the process what my rationale is for placement of motifs and how to deal with matching the pattern up on the seams. It doesn't have to be perfect as we will still be doing more at the beginning of the next lesson to make it work.Lesson 3: Inking of the Artwork for Auto-TracingThis lesson mainly takes place in Procreate. Once we have our artwork complete, we will take it into Adobe Capture to do the vectorizing, coming up in Lesson 5. There are a few considerations we will discuss in the lesson.Lesson 4: Setting Up the Re-Usable Half Drop TemplateTaking the time to produce this template is another efficiency strategy you will learn. Creating the template for the half-drop is not as hard as you would think (it is much easier than doing this in Procreate). I will guide you through all the steps and then show you how I label and reproduce it for the pattern we will be creating.Lesson 5: Vectorizing and Importing the MotifsIn this lesson, I show you what I think is the best method to import your vector items from Adobe Capture. We will do the initial step of colorizing each of the layer groups to prepare for the next step which is to individually group the individual motifs.Lesson 6: Grouping and Arranging the MotifsIn this lesson, I show you how to use the vectorized elements. We proceed to separating each of the motifs into its own group with all its parts. This will pave the way to the next stage which will be to perfect the layout.Lesson 7: Altering Arrangement for Best DesignWe will make adjustments to the layout including repeating elements that are off the background rectangle. This ends up being a good troubleshooting lesson for you as You watch me try to figure out a few issues.Lesson 8: Adjustments and Color to Perfect the LayoutThis lesson will show you how I think about perfecting and finishing the layout. I explain how to do some touch ups on the shape and how to fill in gaps. Then we will review a few of the changes I might be considering when it comes to color.Lesson 9: Additional Advice for Finalizing Your PatternI try to offer you some useful advice as we prepare for the next class in this series.Lesson 10: Conclusion and Wrap UpWe will conclude everything about this stage of the design process in this lesson. I gift you a bit of a pep talk. I encourage you to do a ton of research at this stage and we end with a chat about next steps.Concepts covered:Concepts covered include but are not limited to the half drop repeat patterns in Affinity Designer, Affinity Designer repeat pattern, Affinity Designer Studios, using Adobe Capture to vectorize, Affinity Designer Vector Persona, layering, how to group motif parts and organize layers, Affinity Designer Transform Studio, canvas settings, color schemes and variety with color to improve the pattern, Affinity Designer composites, Affinity Designer Color Studio, Affinity Designer Symbol Studio, shapes, color swatches and lightening or darkening a color quickly, and much more.You will get.109 minutes of direction from an instructor who has been in graphic design business and education for over 40 yearsknowledge of multiple ways to solve each design challengeProject DescriptionTake some time to do some research to settle on a style for your layered pattern. Follow the Procreate instructions to plan your half-drop repeat. Once complete, proceed to the inking stage. The next step is for you to auto-trace it using your favorite method. You could also choose to export your sketch and re-draw the motifs in Affinity Designer. It depends on your level of confidence and your preferred workflow. Follow the lessons to first of all colorize, and secondly, to separate each of your motifs. Once you have individually saved your motifs, adjust your pattern until you are happy with it. Take your time! This is a complex project with lots of steps.
Overview
Section 1: Introduction
Lecture 1 Examples and Assignment Overview
Lecture 2 Design Process for Half-Drop Repeat in Procreate
Lecture 3 Inking of the Artwork for Auto-Tracing
Lecture 4 Setting Up the Re-Usable Half Drop Template
Lecture 5 Vectorizing and Importing the Motifs
Lecture 6 Grouping and Arranging the Motifs
Lecture 7 Altering Arrangement for Best Design
Lecture 8 Adjustments and Color to Perfect the Layout
Lecture 9 Additional Advice for Finalizing Your Pattern
Lecture 10 Conclusion and Wrap Up
Budding surface pattern designers looking to learn vector based software
Download link
rapidgator.net:
You must reply in thread to view hidden text.
uploadgig.com:
You must reply in thread to view hidden text.
nitroflare.com:
You must reply in thread to view hidden text.
")