
L
0
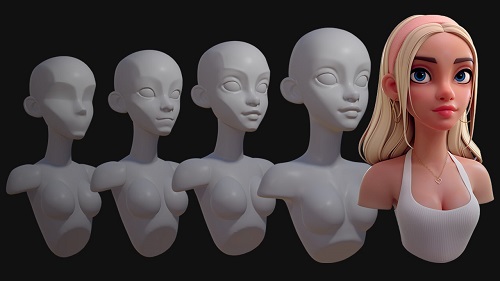
How to Sculpt and Retopologize a Stylized Head in Blender
MP4 | Video: h264, yuv420p, 1920x1080 | Audio: aac, 48000 Hz | Duration: 4h 06m | 16 GB
Genre: eLearning | Language: English
This course takes a different approach by breaking the process up into 8 manageable levels. You can think of these levels like checkpoints, and each builds on the one before it. This organises what you need to do and takes away much of the stress that comes with the daunting task of sculpting a head!
Each level also becomes it’s own exercise, so you can really focus in on those areas you struggle most with!
References that Work
We all know the importance of using reference when working but 2D references are limiting, especially when you’re learning. Most of the time you have just a single image to work from. If you’re lucky you might have a character sheet that gives you Front, Side and 3/4 views. This is slightly better, but it’s far from ideal.
The problem is that when you work in 3D you need to know how the model should look from any percievable angle, otherwise it falls apart. Unfortunately, character sheets don’t include references showing the model 37° to the left and 23° tiilted downwards.
Having a 3D reference right there in the viewport removes any doubt by allowing you to rotate around the model however you like, whenever you like. I sincerely wish I had this when I was starting out.
Self Critique with Confidence
You know that critiques are invaluable when it comes to progression. However, you’re not always keen on the idea of showing people your work just yet, especially on social media where people can be… ruthless!
What 3D references allow you to do is very accurately compare your efforts with your goal. You can literally slide between your work and the reference to see where you got it right, and whereyou need to work on. Imagine how useful this will be to your improvement!
2D References
You will also be provided with 2D references of each from from a variety of different angles. These are very useful when you want to check a shape without moving your 3D references. They’re even more useful when used on a second screen!
")
