O
0
Usb To Ttl Device Interface Pic16F877A With Mikroc Tutorials
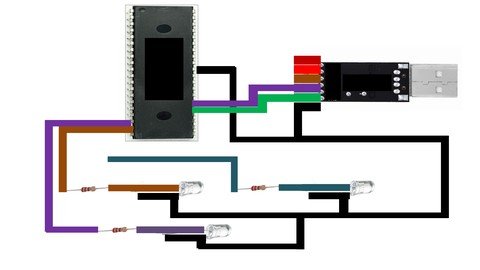
USB to TTL devices like Ch340 or FT232 interface with PIC16F877A to be used as either input or output source or both.
What you'll learn
You will learn how to interface a PIC16F877A microcontroller with a Computer using UART port with USB to TTL device.
You will learn how to establish a communication between PIC microcontroller and Laptop/PC using USB to TTL device like CH340, FT232 or any other.
You will learn how to intialize and program UART port of PIC16F877A microcontroller using MikroC for PIC to interface with a PC.
You will learn how to use a PC/Laptop as a source of input or output device with a PIC16F877A microcontroller using USB to TTL devices.
Requirements
Beginners can learn having intrest in developing useful products in the future.
Description
In this course, you will learn how you can interface a USB to TTL device with a PIC16F877A microcontroller. You will be using mikroC for PIC compiler to program this. USB to TTL devices like CH340 or FT232 all have exactly same coding you can use any of these devices in this setup. You will be needing a UART port of PIC16F877A microcontroller to interface these devices with PIC mcu, After that we will be using mikroC for PIC to send and receive the data from the device. This will establish communication with the computer.The real good thing about this course is that before you get to these tutorials, you will go through introductory lectures which will allow you get basic theory and softwares before you get to real hardaware. This is why this course is great for newbies.Moreover, the same code can be used by any other PIC supported by mikroC for PIC compiler. You can use the same commands. All you have to do is to change the pin configs and the clock settings. Rest is same.Here is the course content:An introduction to PIC16F877A microcontroller.Lecture 1: Introduction to PIC16F877A microcontroller.Lecture 2: Introduction to pins and ports of PIC16F877A microcontroller.Lecture 3: How to use PIC16F877A datasheet.Lecture 4: Setting up PIC16F877A microcontroller.Download and install mikroC for PIC.Lecture 5: How to download and install mikroC for PIC software.Downloading and installing PICKIT 3 programmer tool.Lecture 6: How to download and install PICKIT 3 programmer tool.USB to TTL device interface with PIC16F877A tutorials.Lecture 7: Sending strings from PIC16F877A to PC using USB to TTL device.Lecture 8: Establishing full duplex communication b/w PIC and PC using USB to TTL device.Lecture 9: Read Temperature from LM35 and display it on PC using USB to TTL device via PIC.Lecture 10: Detecting sound using PIC16F877A microcontroller and display result on PC.Lecture 11: RDM6300 based RFID card reader with PIC16F877A and output on PC using USB to TTLLecture 12: Send text from PC to PIC to 20x4 LCD.
Overview
Section 1: An introduction to PIC16F877A microcontroller.
Lecture 1 Introduction to PIC16F877A microcontroller.
Lecture 2 Introduction to pins and ports of PIC16F877A microcontroller.
Lecture 3 How to use PIC16F877A datasheet.
Lecture 4 Setting up PIC16F877A microcontroller.
Section 2: Download and install mikroC for PIC.
Lecture 5 How to download and install mikroC for PIC software.
Section 3: Downloading and installing PICKIT 3 programmer tool.
Lecture 6 How to download and install PICKIT 3 programmer tool.
Section 4: USB to TTL device interface with PIC16F877A tutorials.
Lecture 7 Sending strings from PIC16F877A to PC using USB to TTL device.
Lecture 8 Establishing full duplex communication b/w PIC and PC using USB to TTL device.
Lecture 9 Read Temperature from LM35 and display it on PC using USB to TTL device via PIC.
Lecture 10 Detecting sound using PIC16F877A microcontroller and display result on PC.
Lecture 11 RDM6300 based RFID card reader with PIC16F877A and output on PC using USB to TTL
Lecture 12 Send text from PC to PIC to 20x4 LCD.
Beginners with intrest in making embedded products.

Say "Thank You"
rapidgator.net:
nitroflare.com:
ddownload.com:
Published 12/2024
MP4 | Video: h264, 1920x1080 | Audio: AAC, 44.1 KHz
Language: English | Size: 2.17 GB | Duration: 2h 24m
MP4 | Video: h264, 1920x1080 | Audio: AAC, 44.1 KHz
Language: English | Size: 2.17 GB | Duration: 2h 24m
USB to TTL devices like Ch340 or FT232 interface with PIC16F877A to be used as either input or output source or both.
What you'll learn
You will learn how to interface a PIC16F877A microcontroller with a Computer using UART port with USB to TTL device.
You will learn how to establish a communication between PIC microcontroller and Laptop/PC using USB to TTL device like CH340, FT232 or any other.
You will learn how to intialize and program UART port of PIC16F877A microcontroller using MikroC for PIC to interface with a PC.
You will learn how to use a PC/Laptop as a source of input or output device with a PIC16F877A microcontroller using USB to TTL devices.
Requirements
Beginners can learn having intrest in developing useful products in the future.
Description
In this course, you will learn how you can interface a USB to TTL device with a PIC16F877A microcontroller. You will be using mikroC for PIC compiler to program this. USB to TTL devices like CH340 or FT232 all have exactly same coding you can use any of these devices in this setup. You will be needing a UART port of PIC16F877A microcontroller to interface these devices with PIC mcu, After that we will be using mikroC for PIC to send and receive the data from the device. This will establish communication with the computer.The real good thing about this course is that before you get to these tutorials, you will go through introductory lectures which will allow you get basic theory and softwares before you get to real hardaware. This is why this course is great for newbies.Moreover, the same code can be used by any other PIC supported by mikroC for PIC compiler. You can use the same commands. All you have to do is to change the pin configs and the clock settings. Rest is same.Here is the course content:An introduction to PIC16F877A microcontroller.Lecture 1: Introduction to PIC16F877A microcontroller.Lecture 2: Introduction to pins and ports of PIC16F877A microcontroller.Lecture 3: How to use PIC16F877A datasheet.Lecture 4: Setting up PIC16F877A microcontroller.Download and install mikroC for PIC.Lecture 5: How to download and install mikroC for PIC software.Downloading and installing PICKIT 3 programmer tool.Lecture 6: How to download and install PICKIT 3 programmer tool.USB to TTL device interface with PIC16F877A tutorials.Lecture 7: Sending strings from PIC16F877A to PC using USB to TTL device.Lecture 8: Establishing full duplex communication b/w PIC and PC using USB to TTL device.Lecture 9: Read Temperature from LM35 and display it on PC using USB to TTL device via PIC.Lecture 10: Detecting sound using PIC16F877A microcontroller and display result on PC.Lecture 11: RDM6300 based RFID card reader with PIC16F877A and output on PC using USB to TTLLecture 12: Send text from PC to PIC to 20x4 LCD.
Overview
Section 1: An introduction to PIC16F877A microcontroller.
Lecture 1 Introduction to PIC16F877A microcontroller.
Lecture 2 Introduction to pins and ports of PIC16F877A microcontroller.
Lecture 3 How to use PIC16F877A datasheet.
Lecture 4 Setting up PIC16F877A microcontroller.
Section 2: Download and install mikroC for PIC.
Lecture 5 How to download and install mikroC for PIC software.
Section 3: Downloading and installing PICKIT 3 programmer tool.
Lecture 6 How to download and install PICKIT 3 programmer tool.
Section 4: USB to TTL device interface with PIC16F877A tutorials.
Lecture 7 Sending strings from PIC16F877A to PC using USB to TTL device.
Lecture 8 Establishing full duplex communication b/w PIC and PC using USB to TTL device.
Lecture 9 Read Temperature from LM35 and display it on PC using USB to TTL device via PIC.
Lecture 10 Detecting sound using PIC16F877A microcontroller and display result on PC.
Lecture 11 RDM6300 based RFID card reader with PIC16F877A and output on PC using USB to TTL
Lecture 12 Send text from PC to PIC to 20x4 LCD.
Beginners with intrest in making embedded products.
Screenshots
Say "Thank You"
rapidgator.net:
You must reply in thread to view hidden text.
nitroflare.com:
You must reply in thread to view hidden text.
ddownload.com:
You must reply in thread to view hidden text.
")